| |
| Author |
Message |
Balsa+Nitro
Joined: 21 Jul 2004
Posts: 22
|
 Posted: Tue Aug 10, 2004 2:32 pm Post subject: Robart hinges in ARFs, techniques compared. |
|
|
The purpose here is to determine which technique works best to install Robart hinge point hinges, especially when there is only ¼” deep balsa for them to bond to(as is the case with many ARF’s). I hope this is helpful to everyone who puts Robart hinges in ARF planes like the Funtana, Yak, profiles etc.
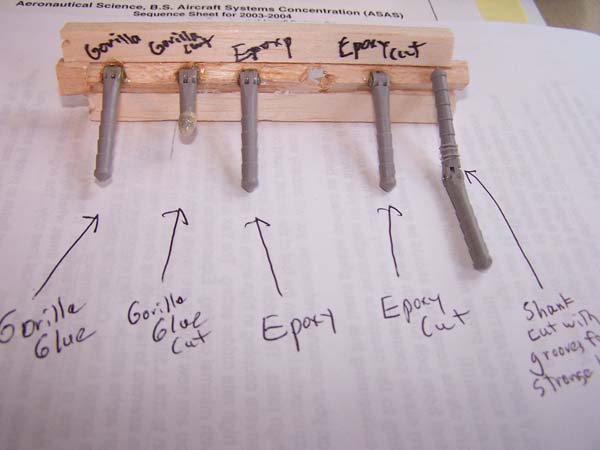
The attached photo shows four 3/16” Robart hinges installed in ¼” deep balsa beveled 45 degrees. They are lebeled if glued with Gorilla Glue or epoxy. Gorilla Glue is polyurethane glue available at Home Depot. It is also sold as Pro-Bond. The Gorilla Glue 2 oz bottle has a great tip for getting the glue into the holes. All holes were drilled by hand with a 1/8” bit, and enlarged by carefully inserting the 3/16” hinges. You will notice the hinge on the right with the grooves cut around the shank. This is what I did on the hinges labeled ‘cut’, the reason is because the balsa on most models control surfaces is too shallow to extend to even the first barb on a Robart hinge. A Dremel cutoff wheel chucked in a drill press makes it quick and easy to cut the grooves.
Here is what I learned after installation:
1. The Gorilla glue foams, causing it to come out the back of the hole and reinforce the bond from behind. You need to orient the model during curing so the foamed up Gorilla Glue piles up where you want it to. With epoxy in the past I have had to mix a second batch of glue, cut small holes in the covering, and add this manually. The Gorilla glue does this automatically, a big plus. See the photo of the back side.
2. The foaming (expanding) of the Gorilla Glue should fill in all the grooves cut in the hinges that I did this on. Another advantage of Gorilla Glue.
3. The excess Gorilla Glue is easier to remove from the knuckled portion of the hinge than the Epoxy.
After curing, and testing the strength of these bonds, here are the results listed from strongest to weakest:
1. Gorilla Glue with grooves cut in hinge. It is easy and bomb proof  I actually used pliers to try to pull the hinge out. I could pull and twist the hinge around and severely mangle the knuckle without breaking the bond.
2. Gorilla Glue alone. This was also pretty strong as far as pulling the hinge strait out, however a small amount of twisting on the hinge breaks the bond.
3. Epoxy with grooves cut in hinge. Not very strong. A little wood was removed with the hinge where the grooves were cut.
4. Epoxy alone. Weak, so weak in fact that I’m sure it would not stand up to normal flight loads.
Keep in mind that the reason these were not all plenty strong is because the hinges were only installed in ¼” deep balsa. This is so shallow that none of the barbs on the hinges could engage in wood. I think the reason #1 was so strong is because the expanding of the Gorilla Glue completely filled the grooves cut into the hinge shank near the knuckle.
Here is the bottom line: Use Gorilla Glue from Home Depot, and cut small grooves aroung the hinge shanks near the knuckle. Also, for sure don't use 3/16" hinges on the tail of a Funtana, they are too big for those thin Funtana tails. Use 1/8" hinges and block them up from behind so the barbs can enguage.
| Description: |
| Experimenting with Robart hinges. |
|
| Filesize: |
43.32 KB |
| Viewed: |
548 Time(s) |
|
_________________
"...The only thing that counts is faith expressing itself through love." Galatians 5:6 |
|
| Back to top |
|
 |
Meyrick
Site Admin

Joined: 15 Apr 2004
Posts: 1316
Location: Fremont, CA
|
| Posted: Tue Aug 10, 2004 2:57 pm Post subject: |
|
|
This is very useful information. I actually use gorilla glue on foamies. They are strong. I've been using epoxy on my Robart Hinges but will start using Gorilla just because it's faster to apply not like epoxy, you would have to mix it.
_________________
--Meyrick-- |
|
| Back to top |
|
|
DTB

Joined: 24 Jul 2004
Posts: 460
Location: Danville, VA
|
| Posted: Wed Aug 11, 2004 9:26 am Post subject: |
|
|
This is great info. I actually just bought some Gorilla Glue yesterday to install some Robart Hinges on my Funtana S 90.
So Balsa+Nitro, let me get this correct. You simply cut a into the hinges some to roughen up the area that will be in contact with the wood. Are the hinges hollow or solid. If hollow, wouldn't this allow the glue to flow into the inerts of the hinge and create a stronger bond?
There is a great "How to install Robart Hinges" Video on RCU.
Click here --> http://www.rcuniverse.com/magazine/article_display.cfm?article_id=269
DTB
_________________
Fly it hard and hover it low...
My RC Photo Page |
|
| Back to top |
|
|
Balsa+Nitro
Joined: 21 Jul 2004
Posts: 22
|
| Posted: Wed Aug 11, 2004 6:57 pm Post subject: |
|
|
DTB, the hinges are not hollow. The idea with the grooves is not to roughen up the hinge, but to cause the grooves to have a similar bonding effect as the barbs. There are no barbs close enough to the knuckle to engage in shallow wood. I would recommend this technique with 3/16" hinges on the ailerons on your Funtana 90. If your tail surfaces are too thin to add 3/16" hinges, then I'd recommend using 1/8" hinges blocked up from behind, or just glued reeeeeeeal good.
_________________
"...The only thing that counts is faith expressing itself through love." Galatians 5:6 |
|
| Back to top |
|
|
DTB
Joined: 24 Jul 2004
Posts: 460
Location: Danville, VA
|
| Posted: Wed Aug 11, 2004 7:35 pm Post subject: |
|
|
| Balsa+Nitro wrote: | | DTB, the hinges are not hollow. The idea with the grooves is not to roughen up the hinge, but to cause the grooves to have a similar bonding effect as the barbs. There are no barbs close enough to the knuckle to engage in shallow wood. I would recommend this technique with 3/16" hinges on the ailerons on your Funtana 90. If your tail surfaces are too thin to add 3/16" hinges, then I'd recommend using 1/8" hinges blocked up from behind, or just glued reeeeeeeal good. |
Good advise. I have 3/16" for the ailerons and 1/8" for the elevator and rudder (same setup as Zac). I have decided to use 4 hinges per elevator half instead of 3 and about 4 in the rudder also. I thought if the Gorilla Glue foams on the back side of the hinge, it should hold the rear of the hinge in place and no allow it to come out of place. Sort of make it's own rear block.
Hopefully anyway.
_________________
Fly it hard and hover it low...
My RC Photo Page |
|
| Back to top |
|
|
Balsa+Nitro
Joined: 21 Jul 2004
Posts: 22
|
| Posted: Thu Aug 12, 2004 6:07 am Post subject: |
|
|
DTB, right on. About the glue foam doing the blocking up from behind, just make sure the surface is oriented so the foam piles up on the balsa around the hinge and not the covering (beveled edge of surface pointed down). I guess that's pretty obvious.
_________________
"...The only thing that counts is faith expressing itself through love." Galatians 5:6 |
|
| Back to top |
|
|
DTB
Joined: 24 Jul 2004
Posts: 460
Location: Danville, VA
|
| Posted: Thu Aug 12, 2004 8:08 am Post subject: |
|
|
| Balsa+Nitro wrote: | | DTB, right on. About the glue foam doing the blocking up from behind, just make sure the surface is oriented so the foam piles up on the balsa around the hinge and not the covering (beveled edge of surface pointed down). I guess that's pretty obvious. |
Great, I will put the glue on the hinges and let gravity pull the glue down onto the wood. Some will probably get on the covering, but that is why it is important not to use too much glue since I know it will expand on the back side. The good thing is that I will be able to see what type of bond it created since the underside is tranparent.
Thanks
_________________
Fly it hard and hover it low...
My RC Photo Page |
|
| Back to top |
|
|
Balsa+Nitro
Joined: 21 Jul 2004
Posts: 22
|
| Posted: Thu Aug 12, 2004 8:35 am Post subject: |
|
|
DTB, if you could post a photo when you are done of how it worked on your tail section with 1/8" hinges that would be great. Thanks.
_________________
"...The only thing that counts is faith expressing itself through love." Galatians 5:6 |
|
| Back to top |
|
|
DTB
Joined: 24 Jul 2004
Posts: 460
Location: Danville, VA
|
| Posted: Thu Aug 12, 2004 9:19 am Post subject: |
|
|
| Balsa+Nitro wrote: | | DTB, if you could post a photo when you are done of how it worked on your tail section with 1/8" hinges that would be great. Thanks. |
Sure, I will do that...
_________________
Fly it hard and hover it low...
My RC Photo Page |
|
| Back to top |
|
|
DTB
Joined: 24 Jul 2004
Posts: 460
Location: Danville, VA
|
| Posted: Sat Aug 21, 2004 4:30 pm Post subject: |
|
|
I am in the process of putting my Funtana together. I promised to show what the back of the Robart hinge would look like on the 1/8". I haven't done the 1/8" yet, but I did however complete the 3/16" Hinge. Once the 1/8" is done, I will show a photo of that also.
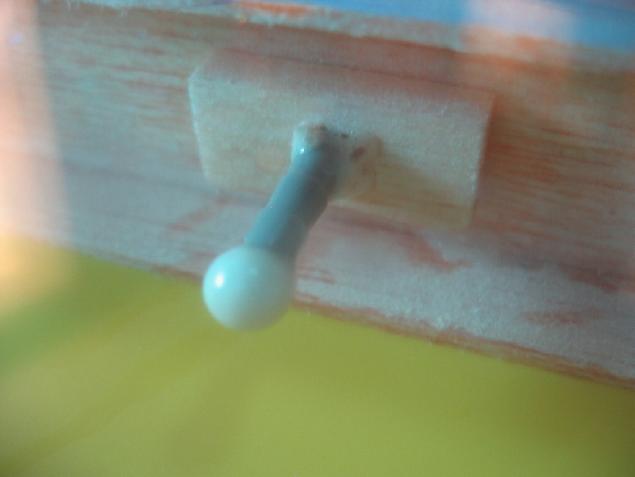
3/16" Robart hinge attached using Gorilla Glue (strong stuff). Notice the foaming action the should lock the hinge in place from behind.
The photo is not the best because I could not use my flash or the blue covering would make the photo bluish.
| Description: |
|
| Filesize: |
17.49 KB |
| Viewed: |
461 Time(s) |
|
|
|
| Back to top |
|
|
DTB
Joined: 24 Jul 2004
Posts: 460
Location: Danville, VA
|
| Posted: Sat Aug 21, 2004 4:37 pm Post subject: |
|
|
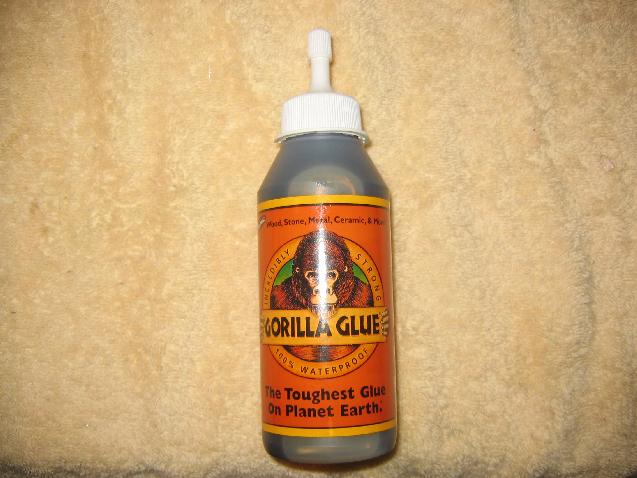
Gorilla Glue in case anyone doesn't know what to look for.
Purchased from Home Depot for $12.00, There were other brands a little cheaper (elmers to be specific). I just went with what I knew would work.
| Description: |
|
| Filesize: |
45.63 KB |
| Viewed: |
457 Time(s) |
|
_________________
Fly it hard and hover it low...
My RC Photo Page |
|
| Back to top |
|
|
DTB
Joined: 24 Jul 2004
Posts: 460
Location: Danville, VA
|
| Posted: Tue Aug 24, 2004 3:07 pm Post subject: Robart 1/8" in 1/4" balsa |
|
|
Hi, I'm still putting my Funtana together but I have completed the robart hinge points which is this threads topic.
(5) 3/16" per ailerons
(4) 1/8" per elevator half
(4) 1/8" in rudder
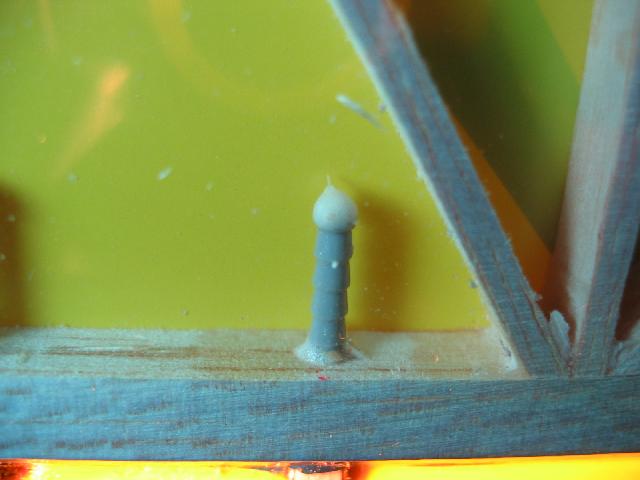
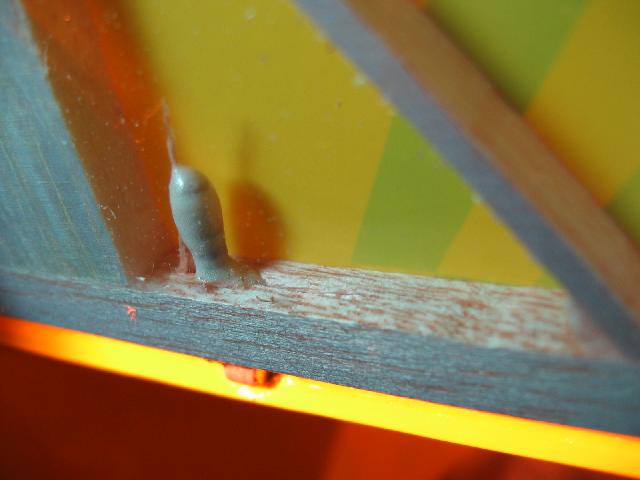
I must admit that I was a little hesitant to use the small hinge points, but after the installation, I don't think they will have any trouble especially using the gorilla glue and by scuffing up the hinge some so that it will grip into the 1/4" balsa as Balsa+Nitro suggested. The hinges are fully cured and have free movement, but are very secure. The Gorilla glue seems to do a much better job than epoxy would do. Since the glue expands and then hardens, the back of the hinge is locked in place from behind and the expanding glue should expand into the pores of the wood to secure it even further.
| Description: |
|
| Filesize: |
28.13 KB |
| Viewed: |
433 Time(s) |
|
_________________
Fly it hard and hover it low...
My RC Photo Page |
|
| Back to top |
|
|
DTB
Joined: 24 Jul 2004
Posts: 460
Location: Danville, VA
|
| Posted: Tue Aug 24, 2004 3:10 pm Post subject: |
|
|
Photo 2
Used a little too much gorilla glue, but didn't hurt anything
| Description: |
|
| Filesize: |
26.94 KB |
| Viewed: |
432 Time(s) |
|
_________________
Fly it hard and hover it low...
My RC Photo Page |
|
| Back to top |
|
|
| |

